
Do you want to start an online store?
If you plan to run a business that sells products or services, you should create a store. With a powerful CMS (Content Management System) like WordPress and a dedicated eCommerce plugin like WooCommerce, you can create a store within a couple of hours.
But if you have no experience creating a store, we have you covered.
This article will show you how to start an online store in 6 simple steps! If you want to create your own business, keep reading this article.
How to Start an Online Store (Steps Explained)
We have gathered six steps to starting your WooCommerce store. They are:
- Domain name selection
- Web hosting selection
- WooCommerce theme selection
- Plugins selection
- SEO and Marketing
- Collect payments
Below, we will mention each step and what you have to do with some recommendations. So, to understand better, keep reading each section.
By the end of this article, you will have a complete idea of how WooCommerce works and how to create your online store.
Step 1: Select a Domain Name
Through the domain name, you and your customers can access the website.
There are multiple domain registrars available that you can use. Some of the popular ones are:
and so on.
Most web hosting companies will also support domain registrations (some premium hosting like Kinsta and WP Engine will not support this feature).
So, choose a domain for your online store first. The domain needs to be simple and easy to pronounce. Adding a keyword inside the domain name would be a great idea. For this website, we use Namesilo as the domain registrar.
They are easy to use.
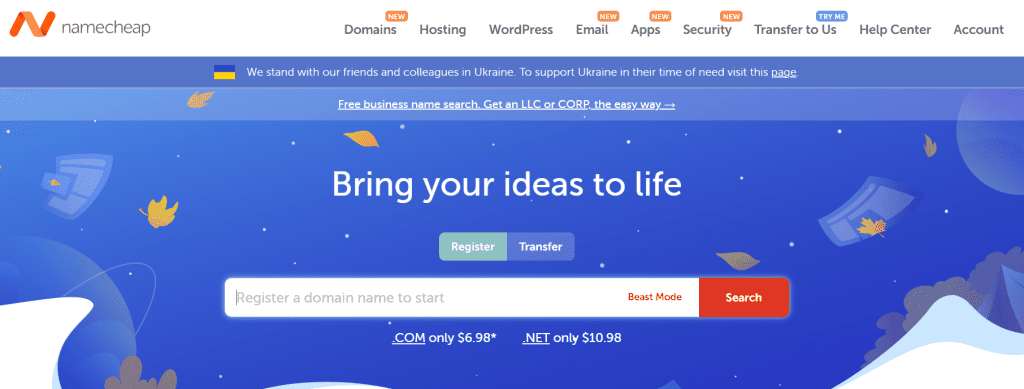
You can pick any service provider according to your interest. For example, let’s say that you would need to use Namecheap as the domain registrar.
First, you need to go to Namecheap.
Now, search for the domain name you would like to register.
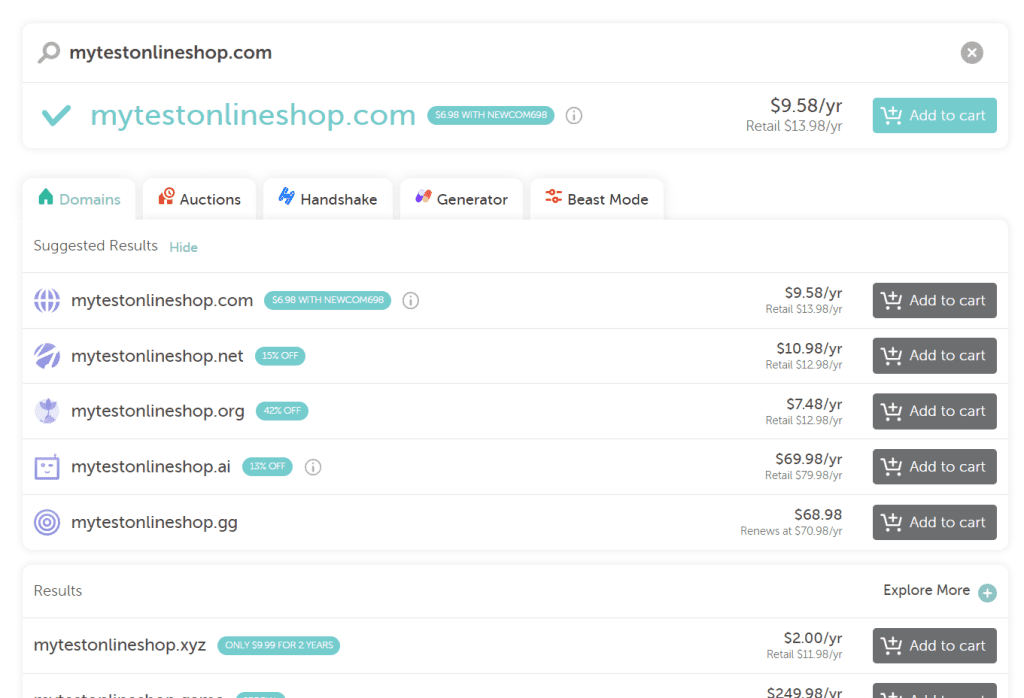
If the domain is available to register, you will see a page like this. On the other hand, you have to search for a new domain or use a different extension.
You can add the domain to the cart if you are happy with the result.

After that, you will be redirected to the checkout page. From there, you can complete the purchase.
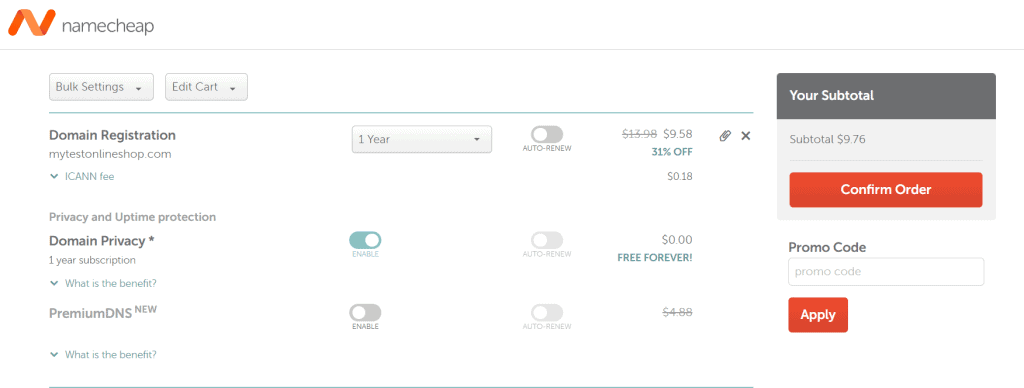
You will see extra configuration options like domain registration tears, auto-renewal option, WHOIS guard configuration, etc.
We highly recommend turning on the WHOIS guard so no spam will be landed on your mobile number or email address.
Once you have configured the domain name, you can complete the purchase, and the domain name will be available in your Namecheap account.
That’s it!
This way, you can choose a domain name.
Step 2: Choose a WooCommerce Hosting
Web hosting is a crucial thing in any website or WooCommerce store. There are multiple hosting companies available that will help you with the task. But, you need to be careful when choosing a web hosting company.
We will not recommend using any local companies since they won’t be able to provide you with better uptime, security, and data protection.
Some of the popular shared hosting companies you can use are:
- Bluehost
- Cloudways
- GreenGeeks
- InMotion Hosting
- GoDaddy
- HostGator
- A2 Hosting
- SiteGround
- DreamHost
and so on.
If you prefer a more robust solution, you should check out the premium companies like:
and so on.
If you are starting a WooCommerce site, you will not get that much traffic initially. So, shared hosting will be good enough.
As your traffic and site grow, you can upgrade the server to a cloud, WooCommerce dedicated hosting, or dedicated server.
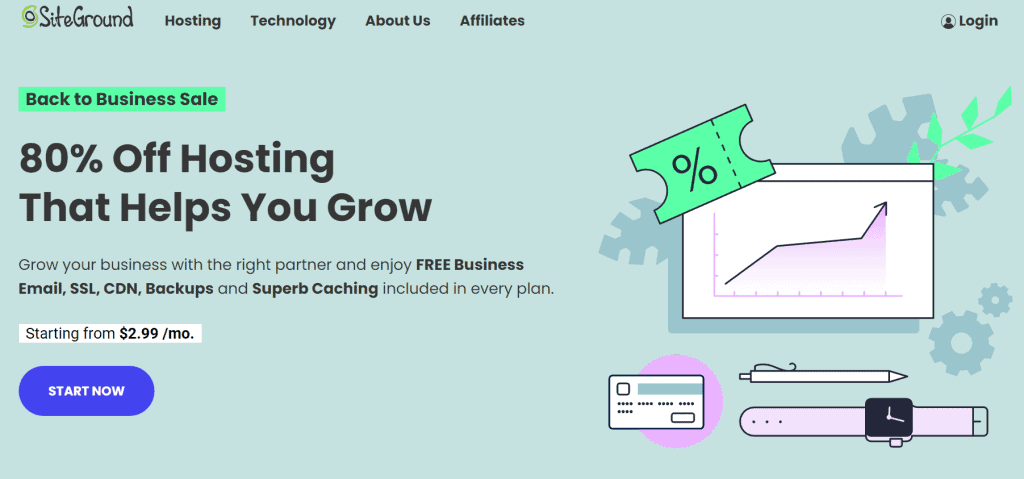
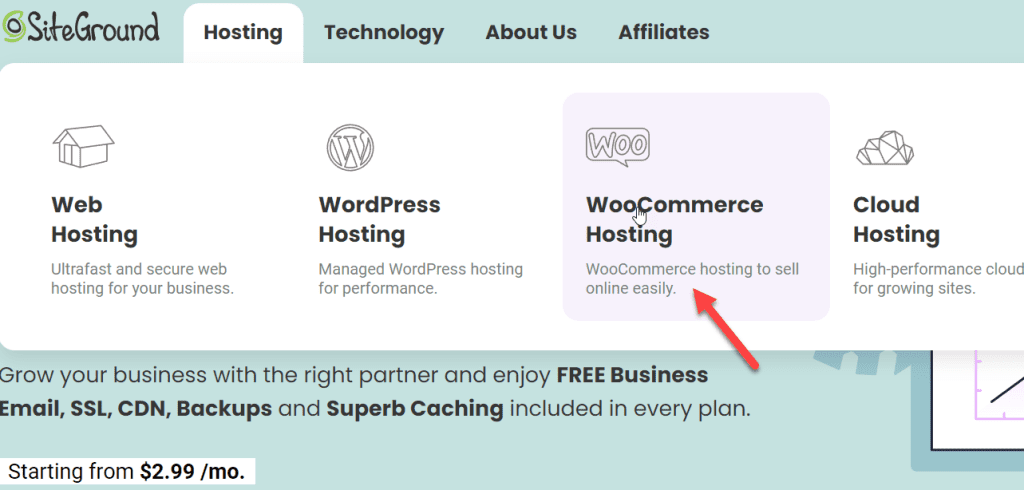
For this tutorial, we will be using SiteGround. They are one of the web hosting providers recommended by the WordPress community.
First, go to SiteGround.
There, you will see multiple web hosting options such as:
- Shared Hosting
- WordPress Hosting
- WooCommerce Hosting
- Cloud Hosting
- Reseller Hosting
You have to choose WooCommerce Hosting from there for better performance.
You will see all the available plans there.
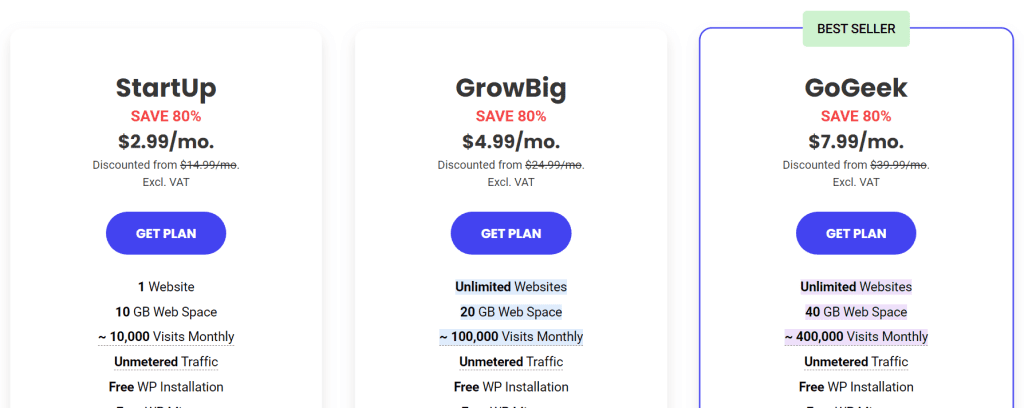
According to your preferences, you can pick a plan. For example, the startup plan is good enough if you host only one website and expect only 10,000 monthly visitors.
On the other hand, you have to choose any higher options.
After selecting a plan, click on the Get Plan button. Once you have done that, you can choose the domain name you have registered. If you haven’t registered a domain name for the store, you can complete the registration from there.
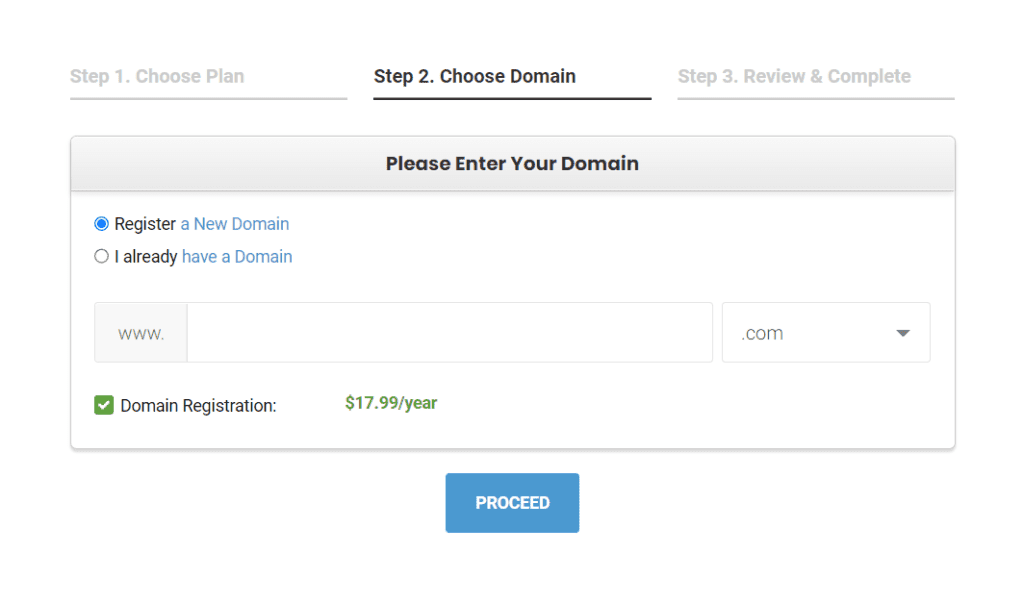
On the next page, you will see fields to enter your personal information, and from the same page, you can customize the domain and web hosting add-ons.
When you choose the hosting, you need to select a period. For example, you can choose yearly billing or 36 monthly billing. The 36 months billing will give you a maximum discount over the purchase.
You can complete the purchase with your credit card or PayPal. They also offer several add-ons like site protection, privacy guard, etc. You can choose them if you want. But, we will be installing more security tools inside our WooCommerce store.
So, this site protection add-on can be ignored.
This way, you can purchase web hosting. If you are good to go, let’s move to the next section – choosing a WooCommerce theme.
Step 3: Get a WooCommerce Theme
A WooCommerce-optimized theme would be an excellent fit for your store. If you searched for the best WooCommerce theme, you would see several free, premium, or freemium ones. But for our users, we recommend Astra.

Astra is a freemium solution used by millions of bloggers around the globe. It is optimized for speed, performance, and SEO.
This section will show you how to use Astra in your online store and make the shop prettier.
If you are serious about your business, we highly recommend using the premium version of the theme. However, the pro version theme comes with many unique features, and you can take your WooCommerce store to the next level with it.
So the first thing you need to do is, purchase the premium version of Astra.
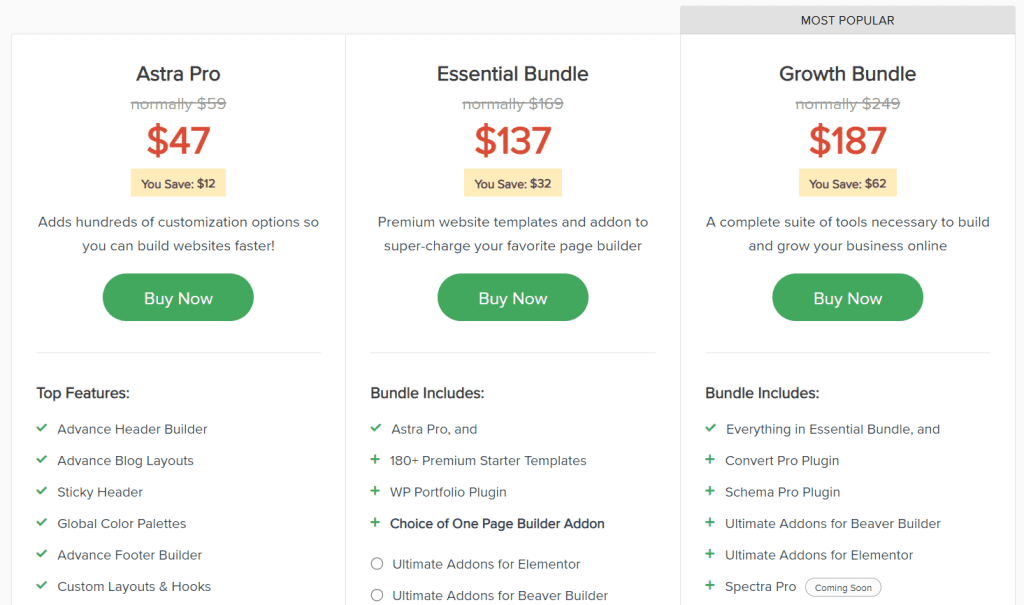
As you can see above, there are three annual memberships available.
- Astra Pro – $47 a year
- Essential Bundle – $137 a year
- Growth Bundle – $187 a year
They have lifetime plans too:
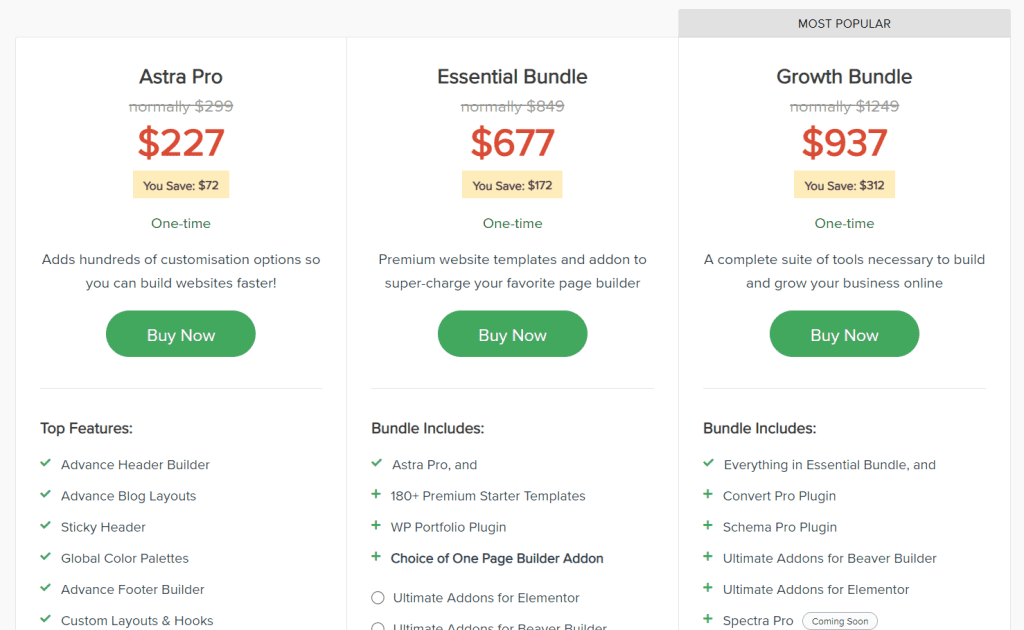
- Astra Pro – $227
- Essential Bundle – $677
- Growth Bundle – $937
You can pick a plan according to your choice. For example, the Astra Pro subscription is good enough if you need the Astra theme alone. On the other hand, if you need their premium start templates, choose the bundled option.
After completing the purchase, you can log in to the Astra dashboard and get the premium files. Then, after downloading the Astra Pro plugin, it is time to use it on your WooCommerce installation.
Log in to the backend of your WordPress site. So far, you have created a WordPress site. First, you must install the WooCommerce plugin, then the Astra theme.
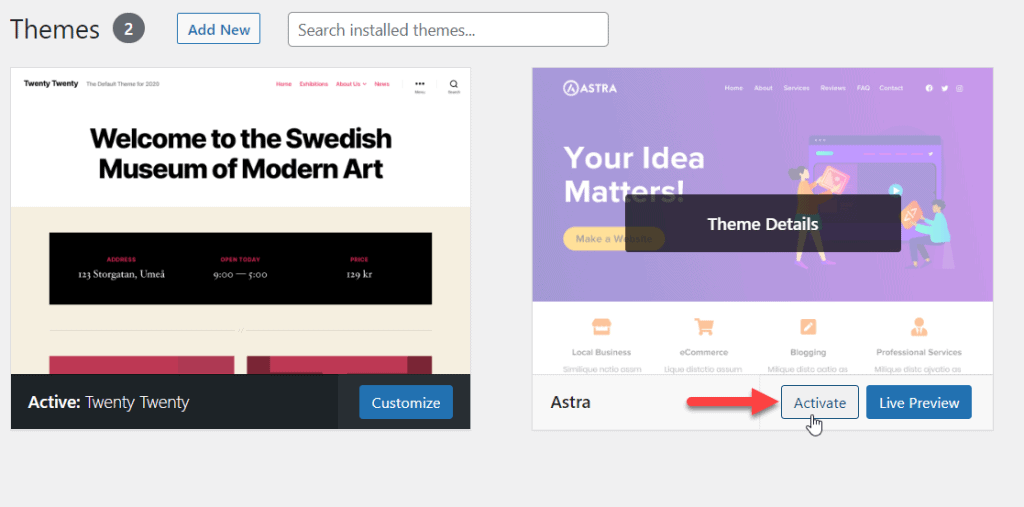
Since Astra’s core theme is free, you can download it from the WordPress themes repository.
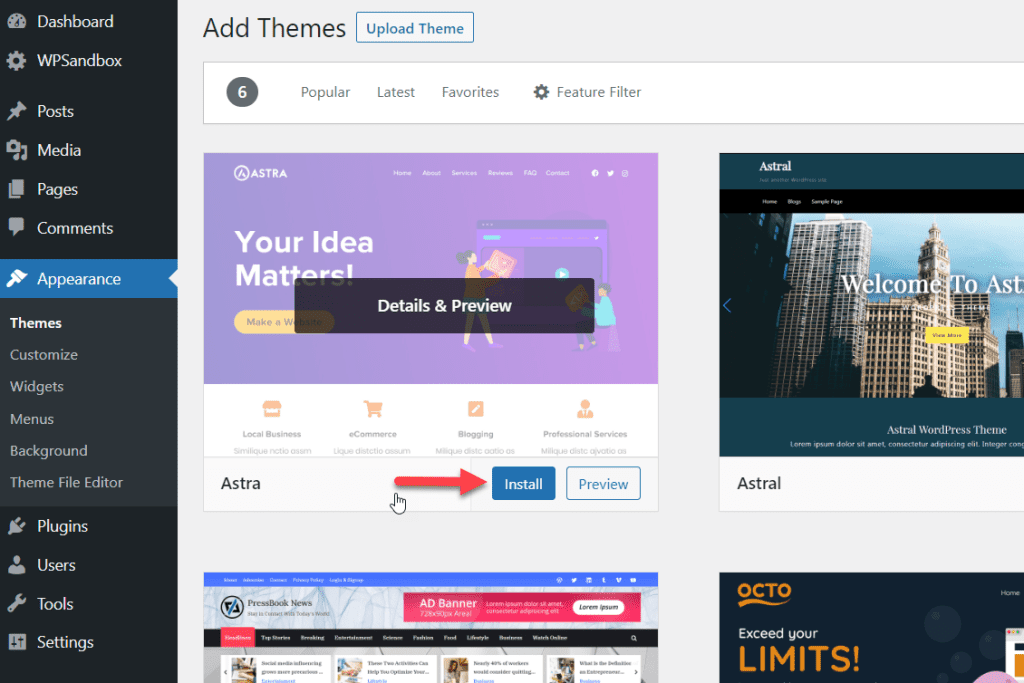
After installing, activate the theme.
Once you have activated the theme, go to the Add New plugins section and upload the Astra Pro plugin. After installing, start it.
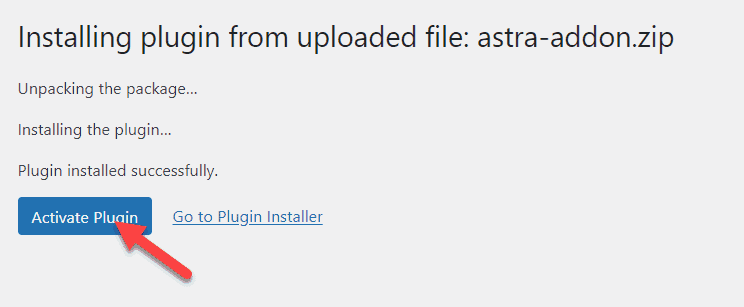
From your Astra account dashboard, you will get a license key. You must copy the key and paste it into the Astra theme panel to activate the plugin’s premium version.
After that, you are good to move forward.
You will see multiple modules you can use on the website. Since we use WooCommerce to sell products, that one is important.
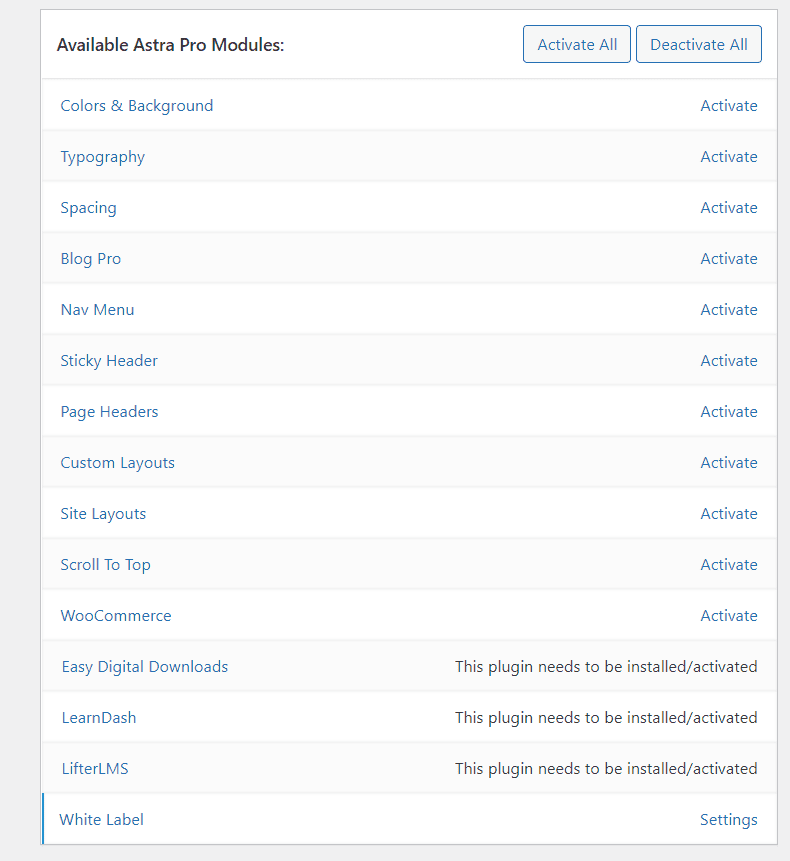
You can activate the modules one by one. If you open the WordPress customizer, you will see the dedicated configuration options by Astra.
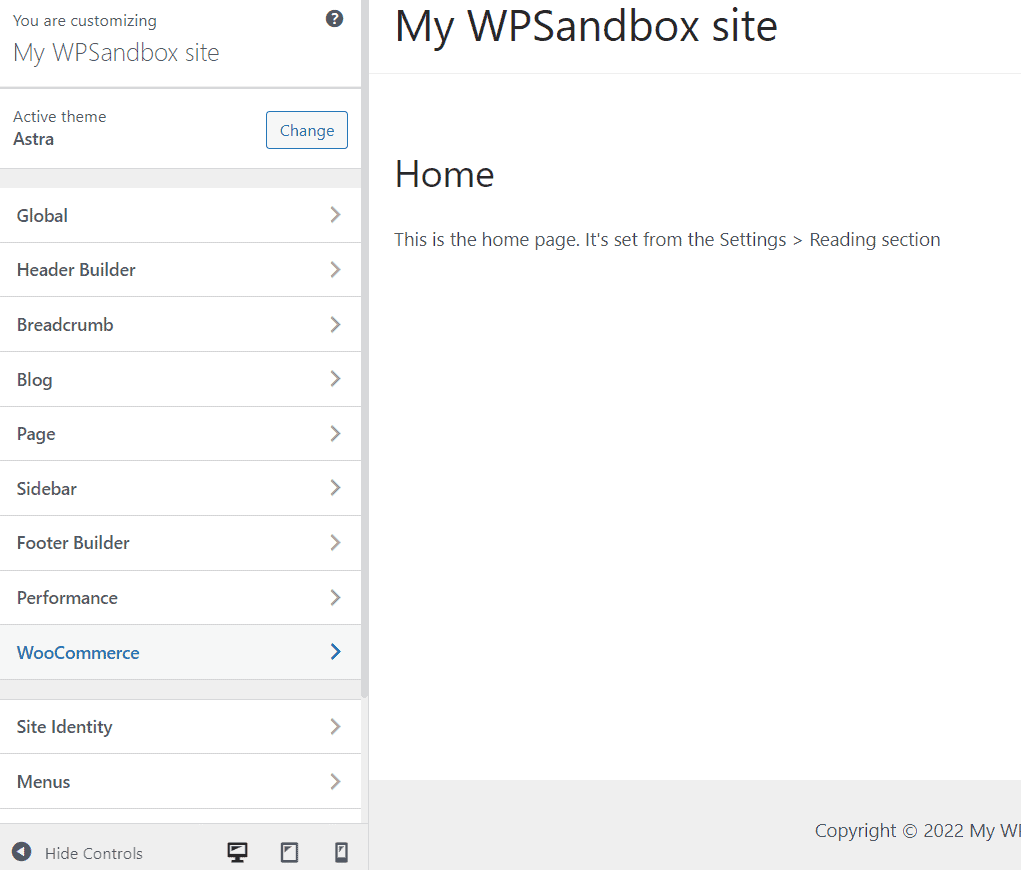
Open the WooCommerce option to see the available modifications you can make.

The available features are:
- General
- Product Catalog
- Single Product
- Cart
- Checkout
- My Account
- Misc
- Product Images
- Store Notice
And so on. You can go through the options and configure the WooCommerce store according to your preferences. Make sure that you have saved all the updates after modifications.
Plus, the theme can also offer you some starter templates. If you need to save time developing the website design, use the starter template.
With the Astra premium theme, you can customize every inch of your WordPress/WooCommerce installation. Furthermore, since it is fast, your bounce rate will be low, and you can rank higher on search engine result pages (Google will consider speed as the ranking factor).
You can get Astra from here. It is a beautiful solution for your WooCommerce installation.
Step 4: Install Necessary Plugins
WordPress plugins will enhance the features of your WordPress/WooCommerce installation. The thing is, for the same purpose, there are multiple plugins.
Make sure you have configured the WooCommerce plugin first. It is simple. You must activate it and set up the billing country, location, payment methods, and so on.
For example, if you search for an SEO plugin for WordPress, you will see All In One SEO Pack, Yoast, Rank Math, and so on. All these plugins come with different features but serve the same purpose – on-page SEO.
So, choosing the right one might be challenging if you are a beginner.
This section will list some of the best plugins you need to use and their purpose. So, you will never be lost and use the best tools in your online store.
- Caching and Website Performance – WP Rocket
- Forms – WPForms
- Social Share – Social Warfare
- Google Analytics – MonsterInsights
- Lead Generation – OptinMonster
- Security – Sucuri
- Backup – UpdraftPlus
- Push Notifications – OneSignal
- Updates – ManageWP
- Live Chatting – LiveChat
- Emails – WP Mail SMTP
- Spam Protection – Akismet
- Translation – WPML
We will be updating this list with new tools and solutions. So, you might want to revisit the page after some time.
Step 5: Do Proper SEO and Marketing
You can take care of the on-page SEO with a plugin like Rank Math. When you write a new blog post or add a new product to the store, you will see an option to optimize the content for better SEO.
So, that part is clear.
If you need to work on off-page SEO, you should use a tool like SEMrush. SEMrush is a premium tool that will help you spy on competitors. For example, you can find backlink opportunities and your competitors’ keywords to rank higher/sell more products.
Guest posting is another suitable method to bring more sales to the store.
Regarding marketing, there are multiple ways. You can use any medium you like. There are Facebook ads, Twitter ads, Google Ads, etc.
Or you can also use your existing email list to promote new products or upcoming events. Again, marketing is one of the crucial things that will help you with sales and conversions.
So, you have to act wisely with it.
Step 6: Start Generating Sales
You are done!
This is how you can create an online store. Also, now, you can sit back and start generating more sales and come up with advanced marketing campaigns.
If you have connected PayPal with the WooCommerce store, you should be able to get all the payments directly into the PayPal account.
On the other hand, if you have configured Stripe, you can get all the payments into the bank account.
Conclusion
As you can see above, starting an online store is pretty simple. All you need is clear guidance and power packed theme like Astra.
Once you have purchased the domain name, you need to link it with your web hosting server. From now on, the website will be up and running. However, before making it public/live, you must customize the theme and plugins and list the products you plan to sell.
Then, you can do the necessary on-page and off-page SEO.
That’s it. This is how you can start an online store and make money from it. Furthermore, the Astra team created a dedicated guide on setting up an online store. Feel free to check it!
We hope you have found this article helpful and enjoyed the read. Please check out our deals section for more exciting deals and coupons if you do.
Leave a Reply